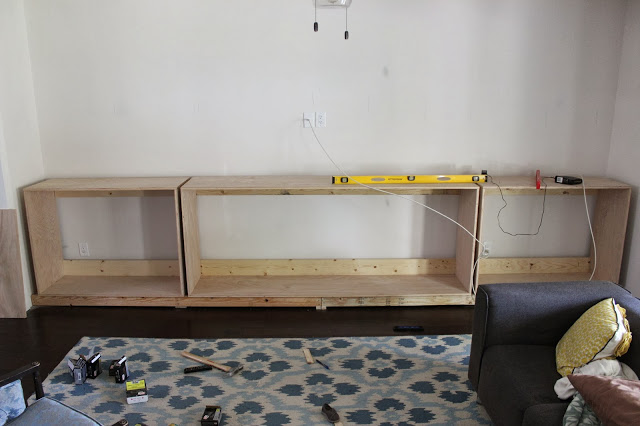


Once the L sections were lined up correctly and square J attached them to each other. To ensure the cabinet stayed square, J used a couple pieces of scrap plywood and used finish nails and braced the corners (these will be removed later).
The next step was to add supports that ran in the back of the cabinets. They fit inside the cabinets and provide support to keep the cabinet sturdy and square. Again we used wood glue and 2″ screws.
The corner blocks were removed after the back supports were installed. Next we lined all the cabinets up and put them in place.

The gap in between the boxes was on purpose so that they would line up correctly with uppers. We will have more on that in later posts. We added some bead board to the back of the open shelving section to match the uppers. Since the cabinets at the ends have doors we didn’t add a back.
Next it was time to add the open shelving. This was actually fairly simple. We decided that we wanted 6 sections which meant we needed two vertical boards and one horizontal. Once we decided on the size of the openings we took a couple pieces of the plywood and cut them to size. Next on the vertical boards we notched out a 3/4″ sliver to accommodate the horizontal board. The sliver runs from the side that is against the wall to the center of the plywood for both vertical cuts. The horizontal ply had two cuts that ran from the front of the plywood to the center. This allowed for the boards to slide in together and then we could use screws and attache the outer cabinet to the shelves.

We lined the cabinets up in position and attached the cabinets to the base and the wall using wood screws. Once the cabinet is on the base you will notice the toe kick (overhang).
Attach the cabinets to the wall by securing the back supports to the 1x6s we attached earlier. If we were able we used a couple longer screws to go through the 1×6 into a stud. We spaced the cabinets with a 1×2 into between them This was so that the trim and dimensions would line up with the uppers. We used finish nails/screws to attach the cabinets to the 1×2 and each other.
Build and Attach the Cabinet Faces
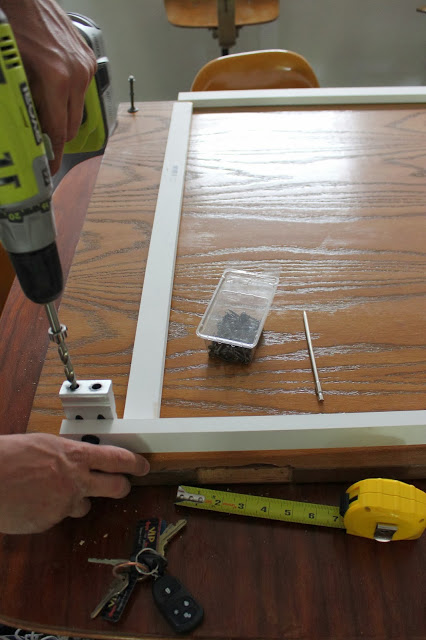
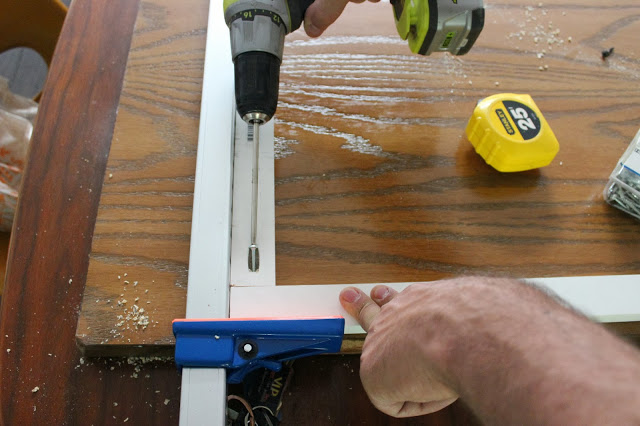
Here is the where the cabinets really take form. Adding the faces is merely just building some rectangles and attaching them to the cabinet with some finish nails. We used pocket screws and a jig to attach the 1x2s to each other. Again using the measurements above we made 2 – 48″ faces for the end caps. The outside measurements were 48″ wide by 35 7/8″ tall. The top of the face will be level with the top of the cabinet but the bottom will face will overhang on the bottom just slightly.
We picked up a couple 5 ft clamps at Harbor Freight (great place for cheap tools, although they are not very good quality) The clamps helped us ensure the corners were square while we used the pocket screws and glue. Make sure all the pocket holes are on the same side (we may have made a couple mistakes that aren’t pictured :))


For the cabinets with doors we added a vertical face piece in the middle.
We then installed the face to the cabinet. To finish off the cabinet we added a horizontal trim strip for the drawers. We did this by installing a level piece of 1×2 behind the face that spanned the entire distance of the inside of the cabinet. We used finish nails to secure this piece to the back of the face. Once that was installed we cut a couple 1x2s and attached them to the horizontal piece so that they were flush with the face.
For the open shelving we did the same but instead of having to install an extra horizontal piece we just attached the face to the plywood shelves.

I just looked through the last couple posts and saw the absolutely stunning built-ins. OMG! Those are the most amazing I have seen. Jay is certainly a master at this. What a talent. The glass doors make such a difference. You guys always seem to find the “perfect” things. Like the chandy for your dining room that put the exclamation point on the room. That campaign dresser behind the sofa’s not too shabby either! Love how your home is progressing.