• Home
  • About Us
  • Happy Juice – your new fav wellness tool
  • Project Gallery
  • Buy One Of Our Homes
  • Contact
    • Amazon
    • Email
    • Facebook
    • Instagram
    • Pinterest
    • RSS
    • Twitter

Dream Book Design

Easy DIY Subway Tile Backsplash Tutorial

One thing that cracks me up the most about having this blog is when friends come up to me and say “Oh Adrianne, I need you to come over and help me install my crown, floors, tile backsplash, etc.” You know, because I must be so handy since I have this blog. Welp, cats outta the bag! I am somewhat handy, but I am mainly an assistant. Jeremy is the star of the show, I am more the documenter, assistant, and help with the brainstorming. The few bits and pieces I have done around the home have been with the aid of the likes of The How To Crew.

You see- serious home improvement projects require you to be at least decent at math, and that my friends I.am.not. Don’t get me wrong, I know my way around any and all power tools, saws, etc. But thats because J has taught me. I would never feel comfortable tackling a whole room of crown on my own. Just being honest. So if you needed to paint your house (inside and out) I would go to a professional to make sure it’s done correctly! Like Lenny Martin Painting in Gresham, have a look around and see which painters will help you with your home project.

Installing this DIY subway tile backsplash though? This project I could have done on my own! Say what? Yup! It was that stinking easy! Heres how we installed our backsplash in one night. It went a little something like this: Put Bray to bed, clean up the hurricane of food covering the kitchen from him eating, pour ourselves a beer, and get started:)

Tools/items you’ll need:
30 sq ft of 3×6 subway tile {available at Floor & Decor}
3 rolls of Bondera for wall tile
Tile cutter or tile saw (Toolsfirst.com lists some wet tile saws if you don’t have one)
Grout and Sealer combined: Color Fill-U and Grout Admix 2
Tape
Pencil
Dremel Saw-Max {to cut tiles for outlets}
Step 1:
Layout out your tiles in your desired pattern. For ours we had to make 2 decisions since we were tiling to separate areas. Area 1 (next to the Fridge): We started with the tile directly above the countertop and lined it up with the far right side (where the countertop ends). This means any odd-shaped tiles would be in the corner next to the fridge. The second row has a half tile above the first row and this alternates. For the second area (Oven wall) we decided to start with a tile centered where the stove is. We worked out from that tile.

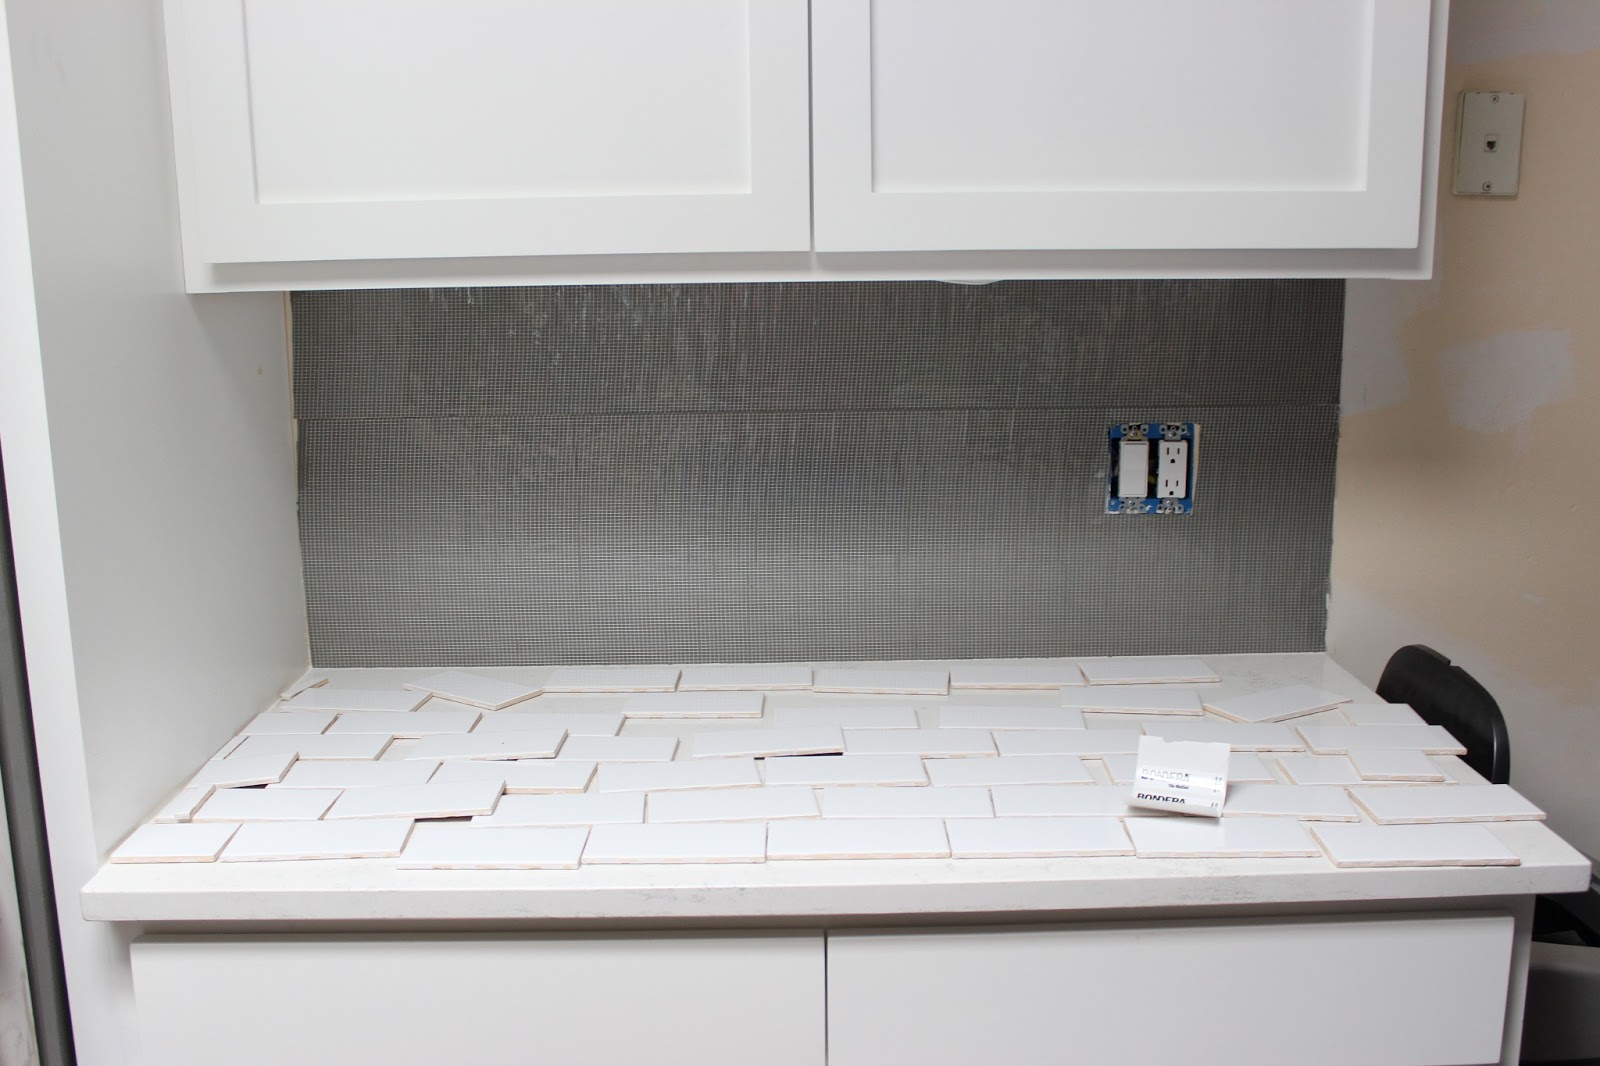
Just ignore that the Bondera is already up in this photo. The tiles were there first:):)

Step 2:
Attach Bondera to wall. We learned about Bondera from Housetweaking. This step was very easy and totally worth the extra money in our opinion. The price difference for Bondera vs thinset for this area was probably about $60. With Bondera, there is virtually no cleanup and no mixing thinset :). To apply Bondera we simply unrolled it, cut it to size (using scissors with cooking spray), peeled the back off and stuck it to the wall. You want to make sure you get it very flat, all the way out to the ends.

Step 3:
Peel the front plastic off the front of the Bondera and start putting those tiles on the wall. We again started with the bottom and worked up. We did not use any spacers for the grout lines, instead we just butted the tiles against each other. The tiles have small lips that act as spacers. We cut the tiles using the simple tile cutter/snapper. When we got to an outlet we marked the tile with tape and a pencil and used our Dremel saw to cut the tiles since the tile cutter/snapper cant handle the intricate cuts we needed. This was the most time consuming part. Still not hard, and totally Adri-do-able!

Step 4:
Once the tiles are placed it is time to grout. With Bondera you have to grout the same day, so we stayed up late and just went ahead and did it all that night. Grouting is simple: just mixed the grout (non-sanded) and apply with the trowel/applicator {follow the grouts instructions for mixing}. We used a grout that is already sealed when it dries. This, like the Bondera, saves a step, and it was only about $10 more than the traditional grout. Make sure to really get the grout in the seams, we would error on putting too much grout on rather than too little. Then just wipe the grout off with a wet sponge.

Step 5:
Caulk and you are finished. 🙂

Before:

After:

We initially purchased edge pieces to use, but I thought the space was too small to need edges. We ended up just leaving them with a raw cut, and painting them white to match elsewhere.

Please believe me, anyone can do this project! And the only power tool used is the Dremel Saw, and that thing is a breeze! Hope you guys like the outcome, but most importantly, I hope it motivates you to try a project on your own. One that you didn’t think was possible. Go, do it, and pat yourself on the back when you realize that you’re a rockstar {or get yourself a thing of ice cream to celebrate, either way!} If you’re really struggling though, it might be a good idea to check out a cutting edge flooring services product to aid you in your tile process. My friend used it and told me it was a fantastic addition.

Share this:

  • Google
  • Pinterest
  • Facebook
  • Twitter

Filed Under: House Projects, New House Kitchen, Tutorials

« Graco Paint Sprayer Winner!!!!
5 Things I’m Loving Right Now »

Comments

  1. Leah says

    June 13, 2013 at 11:48 am

    Wow, you guys did a great job! Your kitchen looks beautiful!

    • adrianne lentine says

      June 14, 2013 at 4:45 pm

      Thanks Leah!

  2. Terri says

    June 13, 2013 at 4:44 pm

    I love it! And you totally inspired me-I’ve been going back and forth for months on whether or not to hire someone or do it myself. Now I’m convinced that I can do it-I never even thought of how much easier it would be without spacers. Thanks for the great advice!

    • adrianne lentine says

      June 14, 2013 at 4:46 pm

      Omg Terri you can TOTALLY do it. I very rarely think I could tackle a ‘bigger’ diy project on my own without help from J, but this is so one I could have!! Good luck! Let us know how it goes.

  3. Anonymous says

    June 14, 2013 at 10:20 am

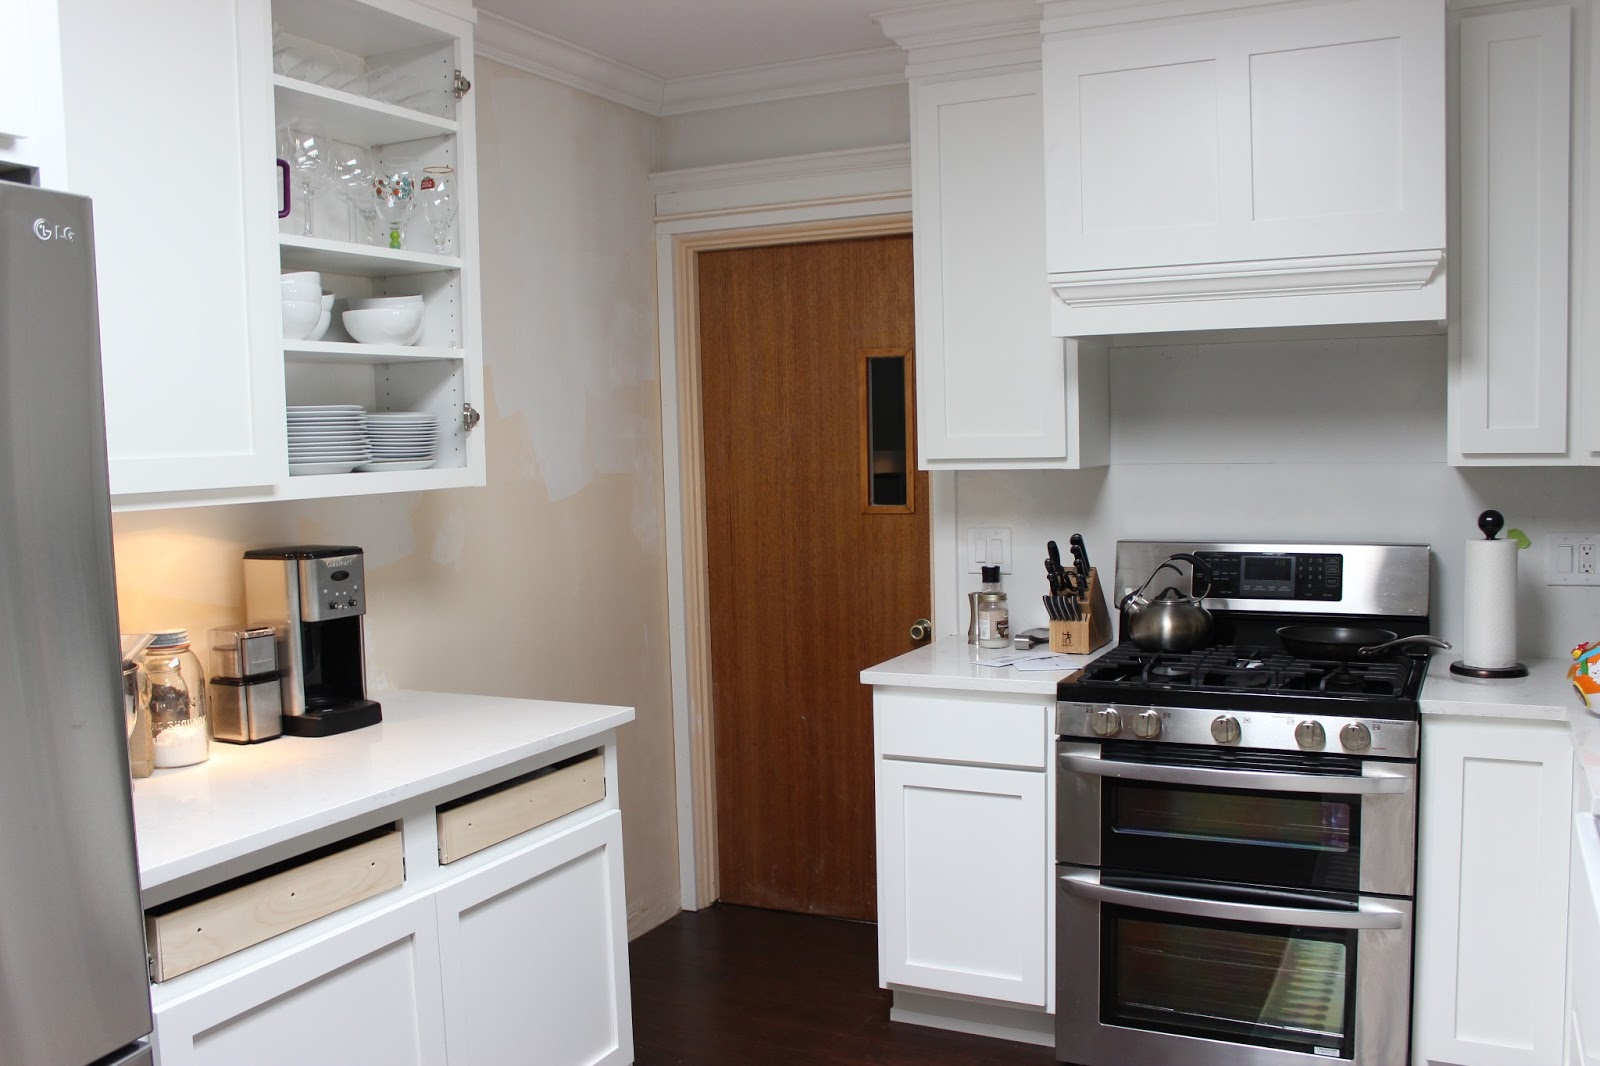
    It looks beautiful! I love your kitchen and was wondering if you could comment on your countertops. I remember you chose something I’ve never heard of before (Okite?). I would love to update my kitchen countertops and love the look of marble but am afraid to use it in my kitchen because of the pitting and staining. Are your countertops holding up as well as you thought they would? Any thoughts you want to share would be appreciated!

    Heidi

    • adrianne lentine says

      June 14, 2013 at 4:50 pm

      Hi Heidi! I have actually been meaning to do a follow up on them. Ill give you some info though in the mean time. THEY ARE AMAZING. As in- I am super lazy and quite often use them as my cutting board, slicing up lemons veggies, etc. And I try to always leave them clean at the end of the night, but there are definite times where there has been citrus juice or red wine left overnight, and it wipes perfectly clean in the morning! The only time we had an issue was when I put a big box from Costco on the counter and didnt realize my pineapple was leaking juice. The ink from the box seaped on the counter and sat there for a few hours. The only way I was able to get all the dark blue ink off was using a little borax with a magic sponge. Now dont quote me on that, because im sure borax isnt ideal for the counter- but it looks good as new now! I LOVE them. Highly recommend! Check back next week, ill be putting up the whole post on them then!

    • Anonymous says

      June 15, 2013 at 10:08 am

      Thank you Adrianne. Can’t wait to see your post!

      Heidi

  4. Sarah H says

    August 29, 2013 at 12:34 am

    Where do you apply the caulk? Just along the bottom where the tile meets the counter?

  5. Kitchen Remodeling NJ says

    December 16, 2013 at 10:03 pm

    Very nice tips and tricks! And thanks for demonstrating with pictures as well. Very useful, take care!

    -Rocko Barbieri

  6. Mary Ann says

    October 27, 2014 at 6:31 pm

    Hi, there.

    Thanks for the step-by-step and the great pics. A few questions remain for me though that I hope you won’t mind answering:

    1. I assume the Bondera plus new tiles thickened the walls. How did that impact the electric outlets? And how did you adjust for it?
    2. Now that it’s one and a half years later, how has your job held up? Did the heat from cooking weaken the tiles’ hold around the stove?

    Thank you!

    • Adri says

      October 28, 2014 at 1:10 pm

      Hi Mary Ann,
      The outlets are perfectly fine with all the tile and bondera..no issue at all.
      The face plates are simply just on the outside of the tiles, as they would be normally.
      The tiles are holding up perfectly, not one issue.

      • Mary Ann says

        October 29, 2014 at 6:39 pm

        Thank you! You’ve inspired us. We just might try this one!

        • Adri says

          October 29, 2014 at 10:56 pm

          Yay- you will love it Mary Ann!!


Hi there. We are a married couple with three sweet kiddos. On this blog we document our DIY home projects, design inspiration, and our parenting life along the way. More >

Instagram @Dreambookdesign

Categories

Archives

  • Email
  • Instagram
  • Pinterest
  • RSS
  • Twitter

Copyright © 2025 · Blog Design by Sweet Theory Designs · Blog Set-Up By Blogelina