When Winston was about 2 weeks old, this amazing home by us had an estate sale. The home was built in the early 1900’s and remained mainly original. What that means to us is door goldmines! We walked away from that estate sale with roughly 20 doors, all unique and super old.
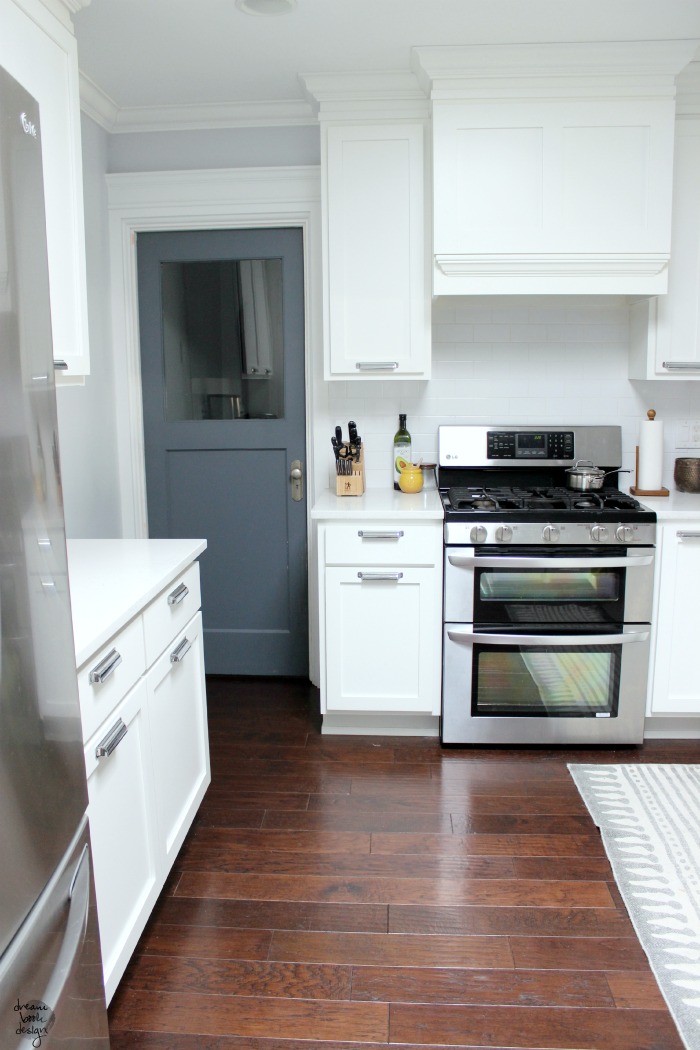
I knew right away that one would make an amazing Laundry room door for our kitchen, and now we finally got it done!
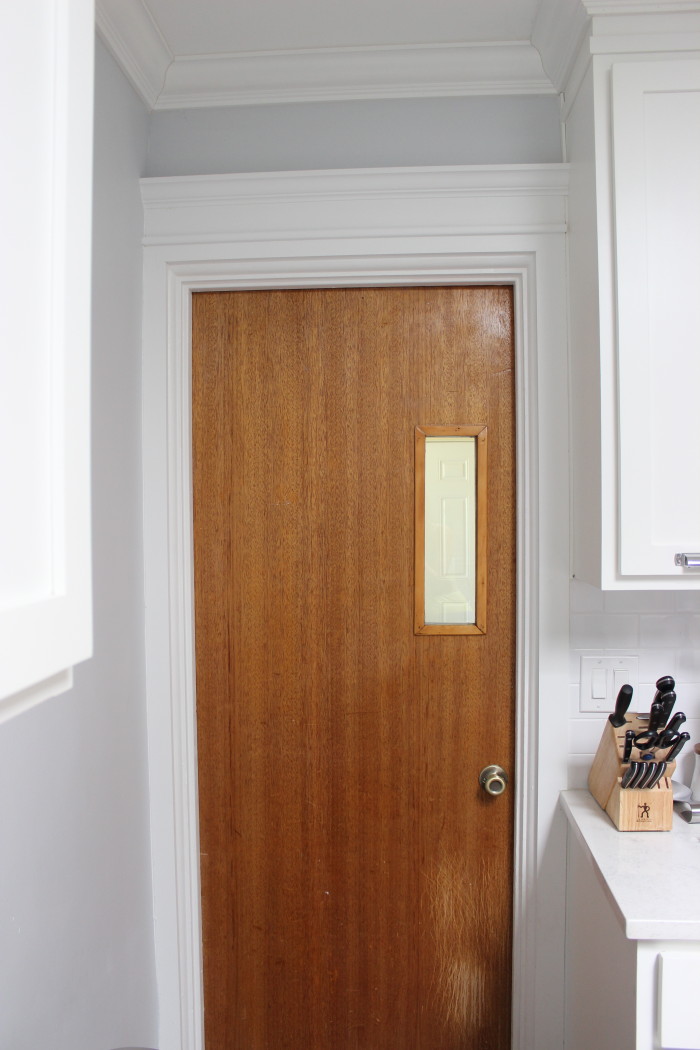
Here is how this door started for us:
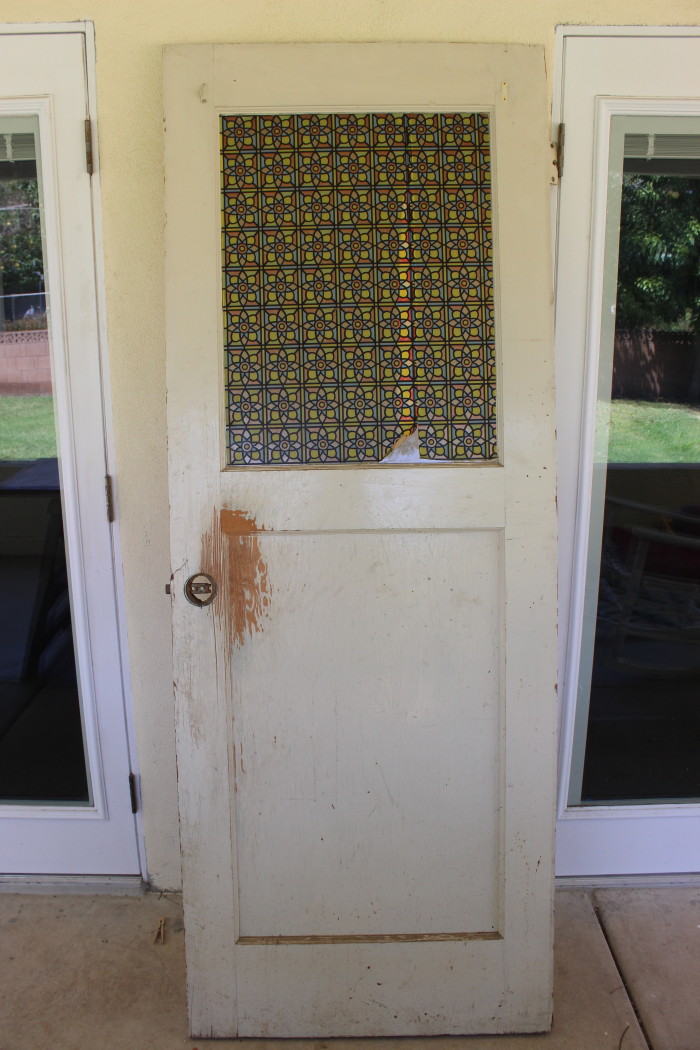
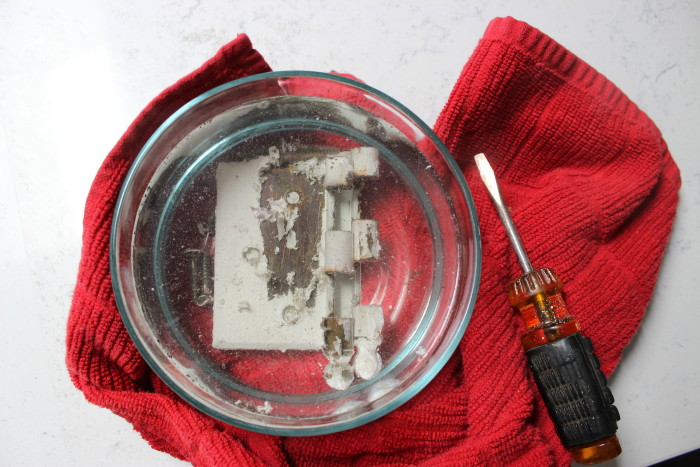
It had amazing bones. The best part of all old doors is that they are actually solid wood, not like all the hollow doors these days. This beauty just needed some cleaning up. I removed the plastic piece of design, we then soaked the hardware to remove the many layers of paint on it. The best way we have found to do this is in a crockpot overnight. Just put it on low and fill with soapy water. In the morning the paint should be able to scrape off super easily without damaging the hardware.
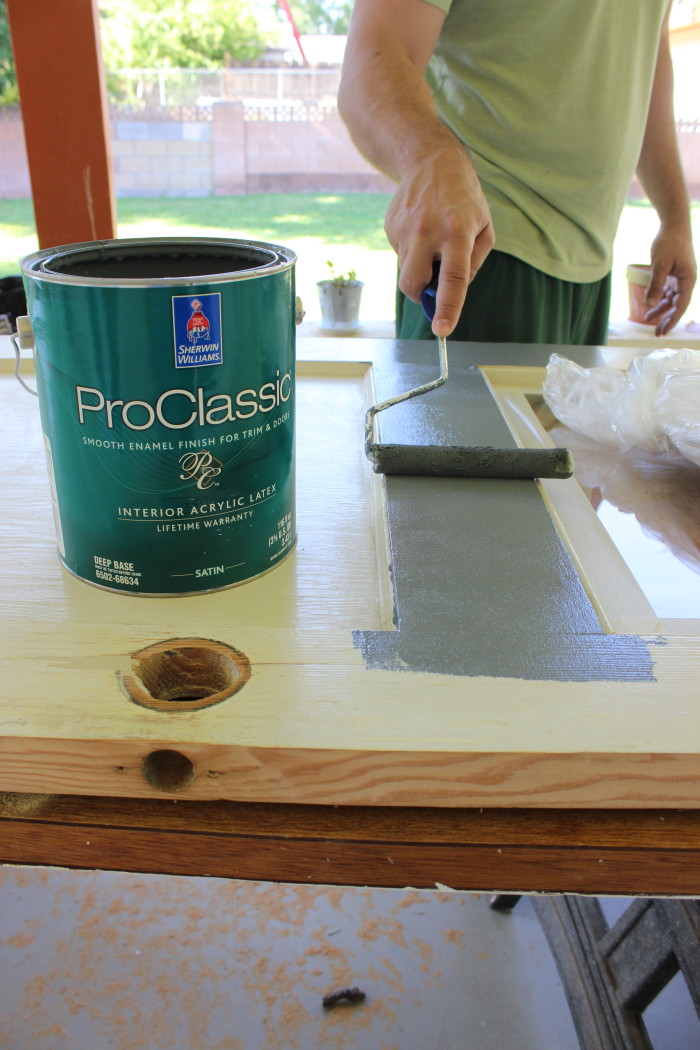
Once all that was done, the fun painting came. We gave the door a light sanding and then painted it with our favorite Sherwin Williams Pro Classic paint. I talked about how amazing this paint is in our post on the dresser makeover for Winston’s room, and it was just as amazing again here.
It is amazing what a transformation a door can take by some fresh paint, and of course the removal of that plastic sheet;)
yes, that is scratching you see at the bottom. Just a little perk of having dogs… :/
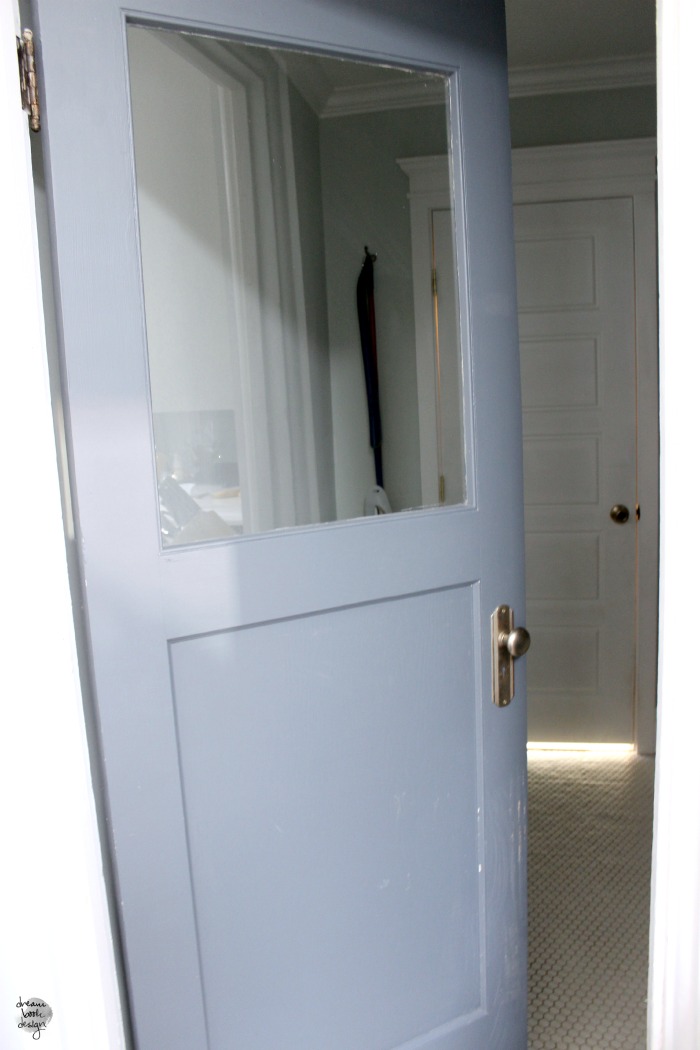
I love that we were able to restore this door and give it life again. We also were able to use a fun vintage set of knobs from eBay that add a ton of character:

There wasn’t anything technically wrong with our old laundry room door, so we will most likely find another spot for it {either in a flip or a different home}, but man I am glad we changed it. Here was the laundry room door before, and now:

What do you think? The only thing the door is missing is the Laundry decal. We are going to go with the same one we did in our old house three years ago! Why change something that you still love so much, right?!
Hope you all have such a great weekend. Jeremy is off of work- so family time and date nights are definitely on the agenda!

We have to keep our upstairs doors closed to keep our cats out (as my husband is allergic to them) and our upper hallway is SO dark. I’ve been thinking of ways to add light—changing out the light fixture, painting the walls a lighter color etc… For some reason, this never occurred to me. Definitely on the hunt for a glass laundry door now. This will make all the difference as our laundry room gets tons of natural light.
For sure switch it out for that! Its amazing how much that will help, and it adds so much character! Good luck friend
It looks amazing! Love the color. It adds such a great “pop” in that corner! My dogs do the same thing to our doors! Ugh! Good thing they’re cute, right? 🙂
haha yes, very good thing they are cute! They always ruin the bottom of our front door and our laundry room door. Oh well, its just a door, right?!
What if you put one of those brass (or nickel) plates at the bottom and/or side where the dog(s) scratch? Of course, then the dog(s) would probably scratch right next to the plate!
Thanks alice- that is a good idea. Yes, they prob would figure out how to ruin the door still probably haha, but its worth a shot!
This is a real WOW!
I love this transformation! Looks great.
Love the door! Have been looking at some like it in my area for pantry door.
Did you happen to do lead paint test first? That is my worry with older houses and with dog claws scratching the door, it could possibly loosen/flake off any underlying lead paint.
Gen
Not gonna lie, we didn’t test it. Didnt really think about it! BUT NOW, well now youve freaked me out- and the dogs will continue to scratch, so I am testing ASAP!! THanks so much for the heads up!
I love this project. How did you get the door to fit? I’ve been advised to avoid attempting to retrofit old doors, even though I love the look, because it takes expert craftsmanship to get it just right. How did you make it work?
Hi Krista,
We actually did a little tutorial on that way back when we first started using odd-end doors in our first home. We havent had any issues at all when doing it this way. Heres the link to the tutorial: https://dreambookdesign.com/2011/05/how-to-hang-a-new-door-in-an-existing-frame/
Thanks, Adri! I hadn’t thought to use the existing door as a template to trim down the new door. I have only added doors to frames that were empty (weird quirk in the house we bought) so I had a heck of a time hanging a cheap new door and trying and failing to use a wood planer. I got so frustrated I finally just took a jigsaw – with the door still in the hinges! – and trimmed it down. I was glad no one was around to see me do it – I’d make any contractor break out in hives, I’m sure. It’s not pretty, but the door opens and closes. Now a year later I’m ready to upgrade to a beautiful wood door with a vintage window I found at a salvage yard. At least the door I trimmed with the jigsaw fits reasonably well enough to use as a template. That’s such an obvious solution and of course I’m here wracking my brain. It seems like a lot of home improvement stuff is like that – you just have to discover those simple tricks!
Krista- you are too funny!!!! and yes, I feel like SO many things are simple tricks, you just have to know the tricks. Thats why we used to YouTube any and all DIYs we were trying. We learned a ton that way!! Glad to help, and good luck:):)