I got my act together today and finally put together the tutorial for a project we did awhile back. One day the fabulous Home Depot decided that we were pretty cool. No, they did not say those exact words, but I just pretend they did. They asked us if we wanted to use some of their products for upcoming projects we had in mind. Our response: YESPLEASEITHOUGHTYOUWOULDNEVERASK. You see, we already do 98% of our project shopping at Home Depot, so its not like we would be changing our norm.
The first thing they sent us to use was their Martha Stewart Living 8-piece decorative painting tool kit.
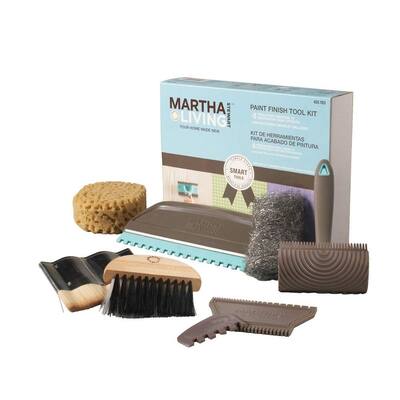
They also sent us a whole box full of Martha Stewart paints. I’m talking glazes, metallics, glitter paint, you name it!
The toughest part of the project..deciding what to do! In the paint kit there are so many options as to what style you can go. You can do 12 different effects of painting, how fun is that?! You can make your paint job look like plaid, herringbone, raw silk, curly maple wood, sponge, etc.
For our project we decided to use the Herringbone effect. The instruction booklet the kit came with wasn’t too clear on how to actually do it, so we went to the website. The man in the instructional video made the project seem like a piece of cake! Here were our steps:
- We started with a 12 inch x 4 foot board from Home Depot. J sanded it down to smooth it all out.
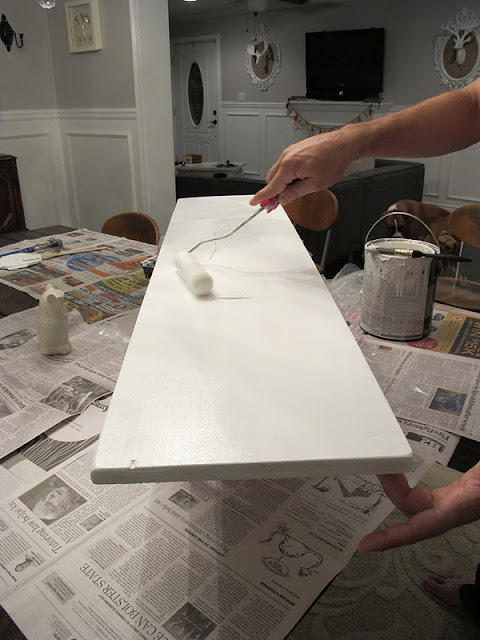
- We then painted it with a classic white from Behr Premium Plus Ultra {the same paint we use for all of our trim in the house} We always have a can or two of this stuff lying around! We wanted there to be a little resistance to it, so the fact that this paint is in Semi-gloss was perfect. Wanna see how a lazy man paints? Thats right, no need for a paint tin, just pour it on and roll it out!
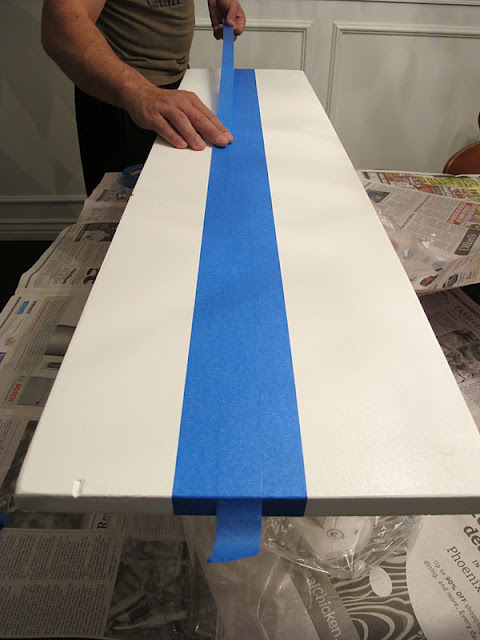
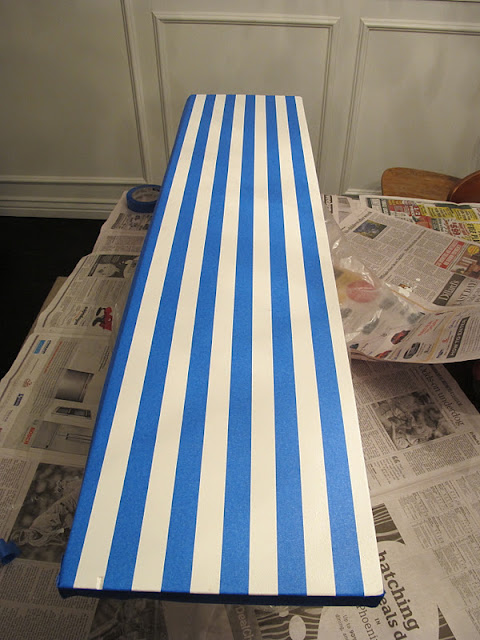
- Up next, the taping. This is by far the most time consuming part of the project, but its still not bad. We were able to tape this bad boy off in under 15 minutes. Here are the steps. 1: Start by finding your middle and and lining up your line of tape to the right of the line. From there use a second piece of tape and butt it directly up to the right edge of the first piece. Do the same for a third piece {these steps are detailed in the video link above.}
- Once all three pieces of tape are on, pull off the middle piece:
- Take that same piece and go to the right {or left, whatever floats your boat first} and repeat the same process:
- Continue doing so until you have your whole piece of wood taped off, each space is the same since it was a piece of tape that was removed:
- Next, bust out your Martha Stewart paint of your choice. We went with a beautiful silver glaze:
- The website gives instructions on how to dilute the glaze, so we did that. Then apply the glaze all over the wood with a normal brush. Try to keep the paint going in the same direction, although its not a huge deal if its not:
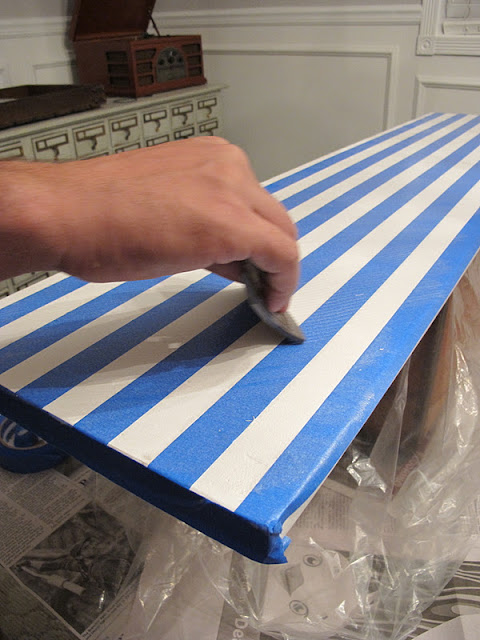
- Now comes the fun part, using the scraper. Start in the upper corner {which ever direction you want to start with} and being scraping downwards at an angle:
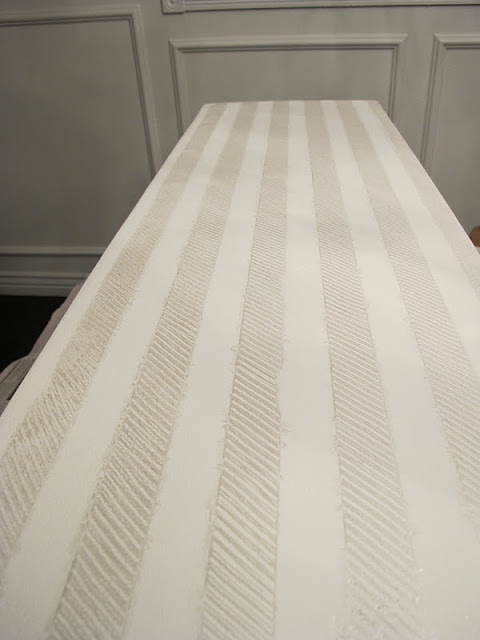
- Continue scraping until you reach the very bottom. Look at how pretty that is!
 |
| If the smudges in between lines really bother you, you can easily clean them up with a wet rag and a small paint brush if you are super exacto concerned. |
- Now you have to be patient. Wait until that paint completely dries and then cover those painted lines with tape:
- Now, repeat the process of the painting and scraping, but now go in the opposite direction with the scraper. Again, remove the tape before the paint dries. In the end- this is what it will look like:
Home Depot gave us the paint kit and paint to try out. The project idea and all opinions expressed are mine and mine alone. Thanks Home Depot for giving us the opportunity to try out something new and fun!
<3,








I think it turned out pretty cool anyway! Could you have done it without diluting the glaze to make it stand out a little more maybe?
Great idea and thanks to HD for helping you out with that project! Love the dining room!
I would be ridiculously excited to get a package like that ;0) Awesome project.