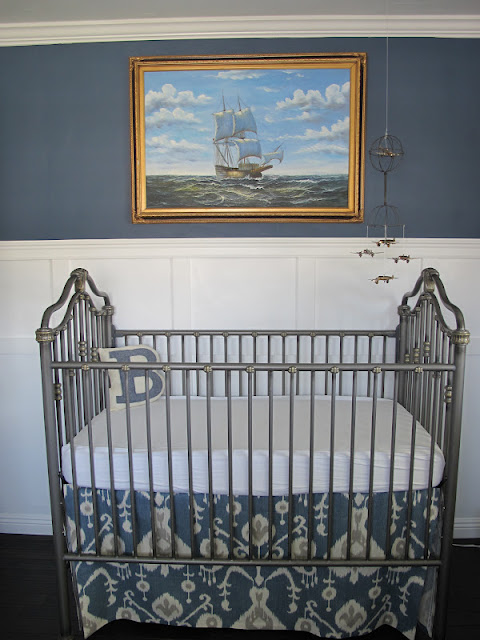
We finally got our fabric in for our crib, and we love it! We got the Ikat fabric from here, and it was $9/yard. Of course now you can order it and have it to you within days, but for some reason when we tried to get it, it was on backorder for almost two months! Just our luck;)
We followed the basic concept for getting this done from Just Bella blog. It was incredibly simple! And the best thing about this project is that you can do it completely sewing machine free:) Here is what you need to get this project done:
- If only doing the two sides and the front of the crib, you will need approx. 2 yards of fabric
- Heat-n-bond
- Iron
- Ribbon
- Needle and string for ribbon {optional, you can still just use the heat-n-bond}
These are the basic steps:
- Measure the length and height of the two sides and the front of the crib. We didn’t bother doing a skirt for the back side of the crib, because you can’t see it since its against the wall.
- Cut your fabric to the measurements, leaving about 2 in. for the fold-over of fabric:

When getting ready to cut our fabric we drew out the lines with a fabric marker, and used a level to get a perfect straight line across.

- Once fabric is cut, follow the heat-n-bonds directions of applying to the fabric:

- Once fabric is hemmed in, then either use the heat-n-bond again, or sew {either by hand or machine}, ribbons to the tops of every piece of fabric. This holds the skirt to the crib. The best part about using ribbon is that you can adjust it as you have to lower the crib for your baby. It will always be the perfect length because of the adjustments!
And thats it! Measure, cut, hem with the heat-n-bond, attach ribbons, and tie on! Done and done!

I love that it hides all the cords we have under his crib.
I should add that I think the fact that the sides don’t connect is going to bother me too much. To solve it I think I will just add velcro to the side edges and connect them that way. Easy fix again! I love that it cost us about $20 total to do this whole thing! Way better than buying one or having one made for us!

You could “add” a faux pleat– a panel of fabric– at each corner and attach with Velcro dots or strips. These panels would prevent pulling the existing panels too taut, etc.
That fabric looks awesome with the metal finish on the crib! Great choice! And I like this so much better than a regular crib skirt. my crib skirt constantly shifted, and it was not quite wide enough to be an even length on both sides. Wish I would’ve done something like this.
I was just going to say what Kelley said. Make a panel about 4 inches wide and the same length as the front and sides. Tie it in the space underneath the two pieces at each corner. Done! I’m glad I didn’t have to worry about crib skirts when my kids were little. They weren’t invented then. We did have bumpers which I guess are now outlawed. I have saved my crib for over twenty years, now I find out that they are all banned. I guess I’ll have to figure out how to make a bench from the pieces. Great fabric.
I love the ikat! and it’s fun that it goes all the way to the floor… beautiful job. The little “b” pillow is adorable too.
This turned out fantastic! I love that fabric you chose. I might just consider using the heat n’ bond next go around 🙂
I don’t mind sewing but I’m going to keep this little tutorial handy for whenever the Mr. and I decide to have a baby. I was browsing your blog though and LOVE it. I’m a new follower!
xxJess