
Today is a good day for two reasons, one- it is Friday, two- I have a great DIY project for y’all.
I have been coveting those wooden sliced trays from all over for awhile now, but have never been willing to pay the price for them. Well, it was our lucky day about a month ago when there was a pretty bad storm here. We were lucky to have none of our trees fall down, but all of those around us had some damage done. That lead to all of our neighbors putting out massive tree stumps, and us getting our pick of the best one!
We snatched up the fattest one we could find, and went to town with our Ryobi Chainsaw. Not gonna lie, Jeremy had a blast using the chainsaw and used it so much we’re going need to get a new chainsaw chain!
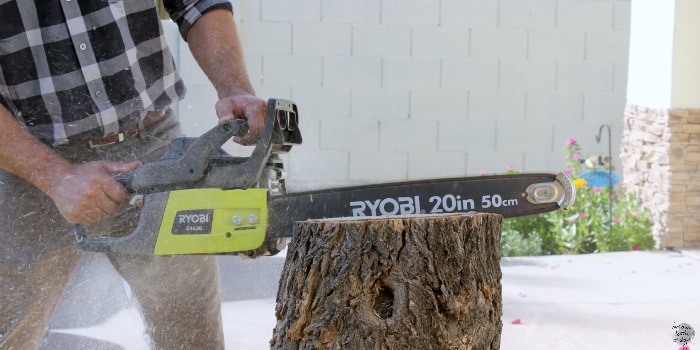

Look at him go! He’s not a pro, but ever since his friend told him about the coocheer chainsaw, Jeremy’s been into DIYs. Anyway, here is how we turned that huge stump into a perfectly smooth wooden slice tray:
We started by making it flat on both ends by loping some off, and then we went straight for the center. That is going to give you your best shot at making the tray as smooth and flat as possible:

Once we got a somewhat flat tray cut out we then went to town with our Ryobi Planer. This thing was awesome. If you have never used a planer, they are amazing. You definitely have to be patient during the process because it takes time, but the results are incredible. This was our first time really using this planer, so it took us a hot minute to figure out how to use it efficently. So to save y’alls back from breaking like ours did, put the dang thing up on a table of some sort. We first had the Planer on the ground, and it was fine for the first 50 passes, but at about 100- I wanted to kill Jeremy!

Once the Ryobi Planer was on the table, it was a breeze! We planed both sides of the slice so that we could flip it over at any given time and have it be perfectly smooth! Once all the planing was finished, we lightly sanded it down quickly, and then sealed it:

I seriously love how it turned out! It is so thick, smooth, and flat! I think it is so fun to think that we sawed this bad boy out of a real stump, rather than say- World Market {nothing against them, just like that its ours!}

Now heres where I need your input!! I can’t decide where I want it to go. This sweet thing took some time, so I really cherish it- which naturally makes me super indecisive about it. Here are our options:

1- As a tray on the Card Catalog Buffet
2- As a runner on our Dining Room table
3- Hung on a wall. We would probably use a wood-burning pen and write something on it {kind of like our DIY Driftwood Art}
My thoughts are most likely either on the table or the card catalog, but I would love to have your input!

Disclosure: We partnered with Ryobi Powertools in order to create this and many other DIY projects. They are simply the best!

That came out awesome! I love it on the table!! 🙂
Thanks Susan!! And thanks for the feedback!
I love it on the table as well
Thanks for the feedback Brenna!!
I vote card catalog table! I love the light table against the wood and the blue jars! I also have to say thanks for posting it so early so that I could read it during an early morning feeding of my little one!
Haha gotta love those early morning feedings! Thanks for the feedback! Enjoy all the snuggles you are getting:)
Cute! Love #1
Thanks girl!! Love you and hope to see you around soon!
Card catalog!! Love the contrast, even though it would be seen more often on the table. I think it kind of blends in! Love it!!
Thanks Carly. I know, I love it on the table- but the wood on wood is kinda hard to see!
LOVE LOVE LOVE! This is so great! I had a client who did something similar for all of her wedding centerpieces… not cut longwise like you did, but she made hers all round and stacked them all over her reception. It looked really cool. I love this on your table! And I love your card catalog piece! AWESOME! Pinning this to remember as a project to do when we move into our new house!
I love it on the table or the buffet, but if I had to choose, I’d definitely say table!! Nice work! It is beautiful.
Thanks so much Lisa! I am loving everyones input:)
My vote is for the card catalog! I think the wood-on-wood makes it harder for the awesomeness to stand out! I also love the idea of turning into a unique wall-hanging. And if you inscribe something on one side, you could always take it down and still use it as a tray or runner on the flip side!
You are so right about the flipping of sides if we wood burned it! Genius:)
Definitely the buffet – I feel like it gets lost on the wood table.