As cheesy as it sounds, I have always dreamed of the day when I would own a home, have a family, and have Playsets for my kid{s} in the backyard. There are many things I dreamed of regarding being a mama, but for some reason I always looked forward to the playset part. Maybe its because I grew up with an awesome one, or maybe because I realized it would save me numerous trips to a park;)
Our great friends from Rafterhouse hooked us up with a Sunray playset they did not need anymore. It definitely had some wear and tear to it, but we revived it- and its now AMAZING. When we first saw it we knew it would need some work, after all it is a wooden set and had been sitting in a yard that gets irrigation {as do we}.

We hired a crew to tear it down, transport, and reassemble it for us, since we neither had the experience or the time. Also, I just imagined J and I building it and then a friends kid coming over and getting hurt because we did something wrong. Sometimes it is truly better to just hire a job out:)
Once the guys delivered it to us, I asked them exactly what they thought needing replacing if it was for their own kids. Thankfully these guys were awesome and went through each piece and gave me all the info I needed! We replaced three of the base wooden boards, and three side wooden boards. We also ended up replacing all of the rope, since it was pretty brittle.
In order for the set to look cohesive with the new boards we knew we wanted to stain it {and seal it}, but then J found something way more fun that a typical stain!

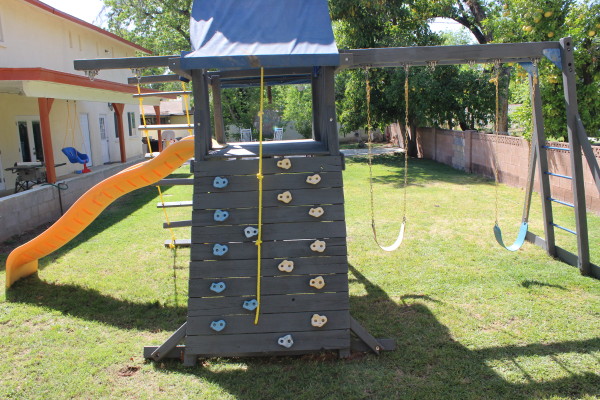
This stuff acts as a stain, can be made in to any paint color {we chose this awesome grey}, AND its a sealer as well. Basically, its what my dreams are made of! Once the whole playset was sanded down it was time to apply it, thickly. It was amazing using a product that not only did a good job, but combined about three things in to one!
Once all of it was finished, we brought back the assembly guys, and they gave me what all my dreams imagined!
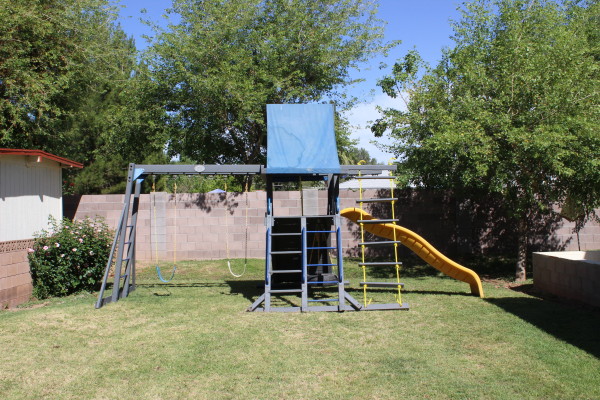
I can’t wait for Braylen to wake up and play with it today! He is going to flip out!!! And yes, it does kind of suck that we just got it up while going in to summer, but I have a feeling that Bray will care less if it is 100 out, he will want to play:) Thanks again Rafterhouse, you guys are the best!

This is literally the exact model we just got rid of. I didn’t even think about refinishing it, wow! It looks amazing!!! Love the paint color. Thankful my in laws bought us a new one, but we loved this one so much, and I know you will too! With the second baby coming park trips are so much harder, and it’s so nice to just go our in your backyard and have tons of play, and not have to leave your house (while baby naps especially). Have so much fun!
No way! So random! Was yours getting a little too worn? Do you have any idea how old it was? We know this one is made for Costco, but we dont know how old it is. We are for sure looking forward to having the ‘park’ in our own yard now:)