Do you ever have a painting project that you think will be easy-peasy, and you get in to it and it totally sucks? Wether it be it takes way longer than expected, or it isn’t looking how you want it… I think we have all been there and we instantly wish we had just hired a Houston painting contractor to do the work instead. Our first {and im assuming more to come} tricky painting project of this house was Braylens nursery built-ins. Here was what we were tackling:
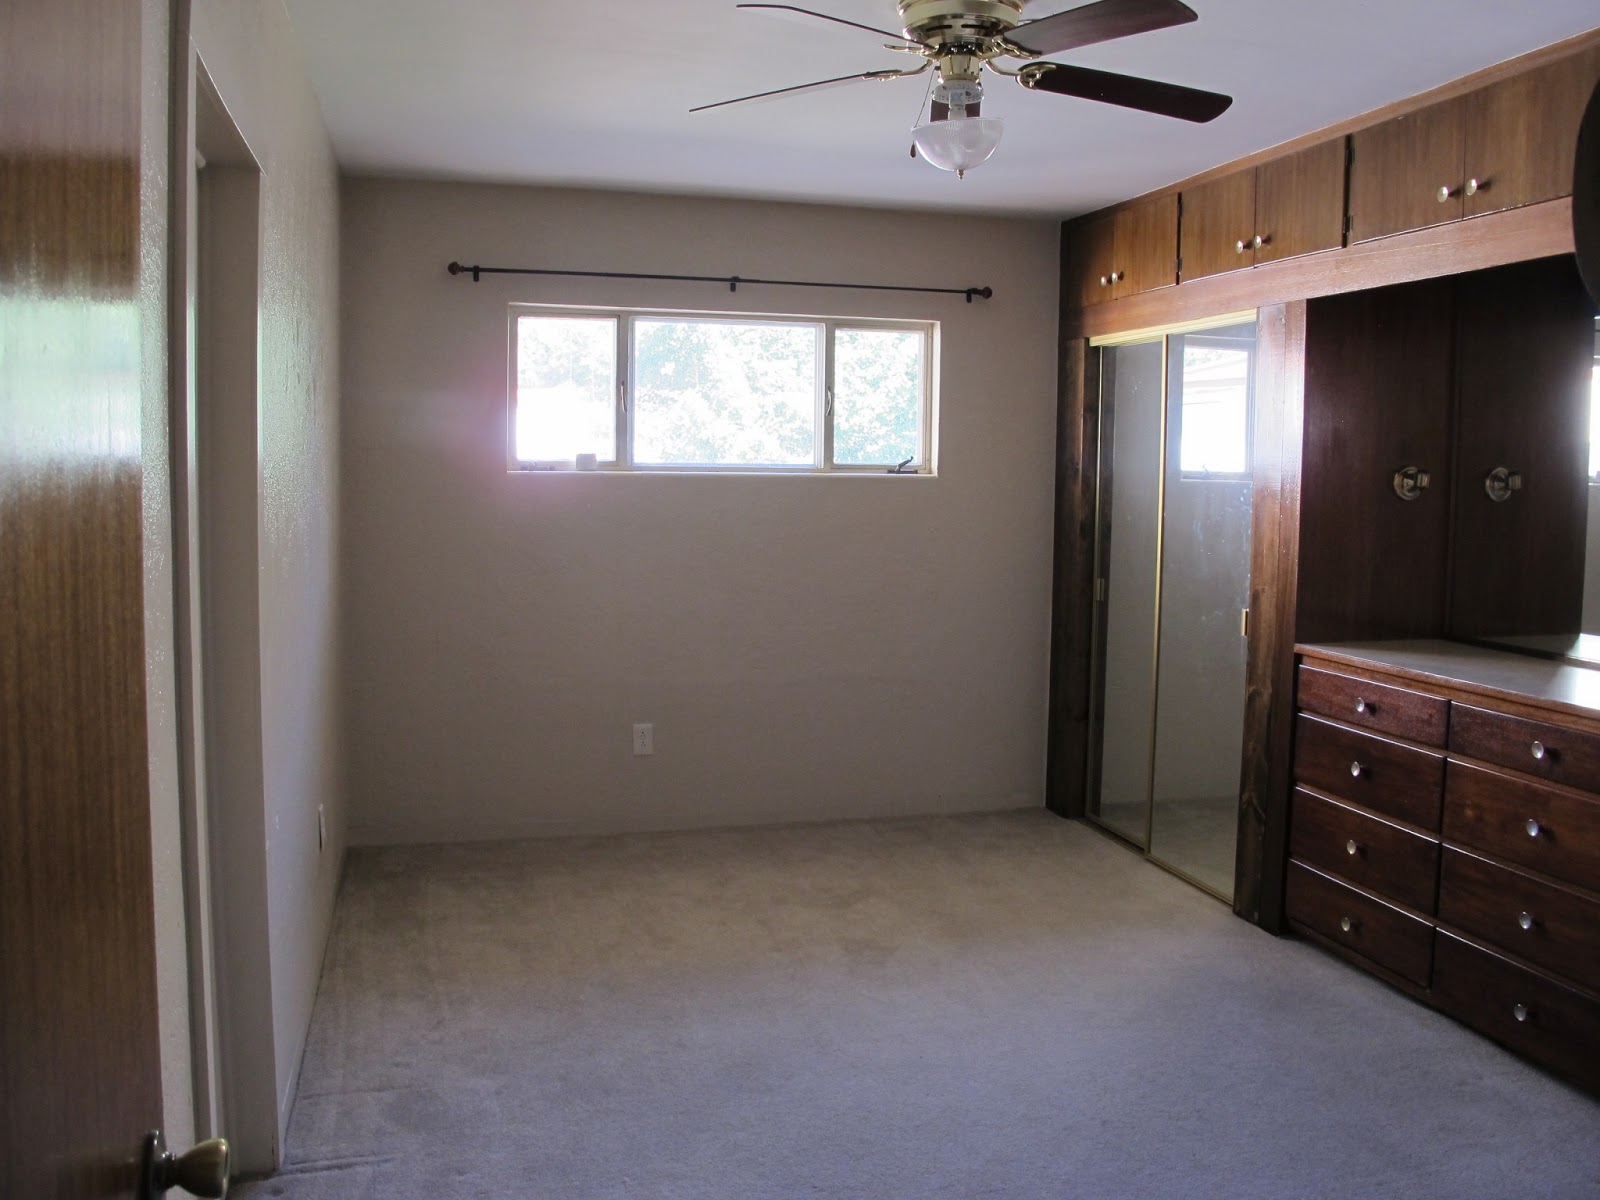

We thought these would require a few coats, but nothing out of the norm. Boy were we wrong! There was so much lacqure and polyurethane on them that these things just soaked up the paint. And soaked it up some more.
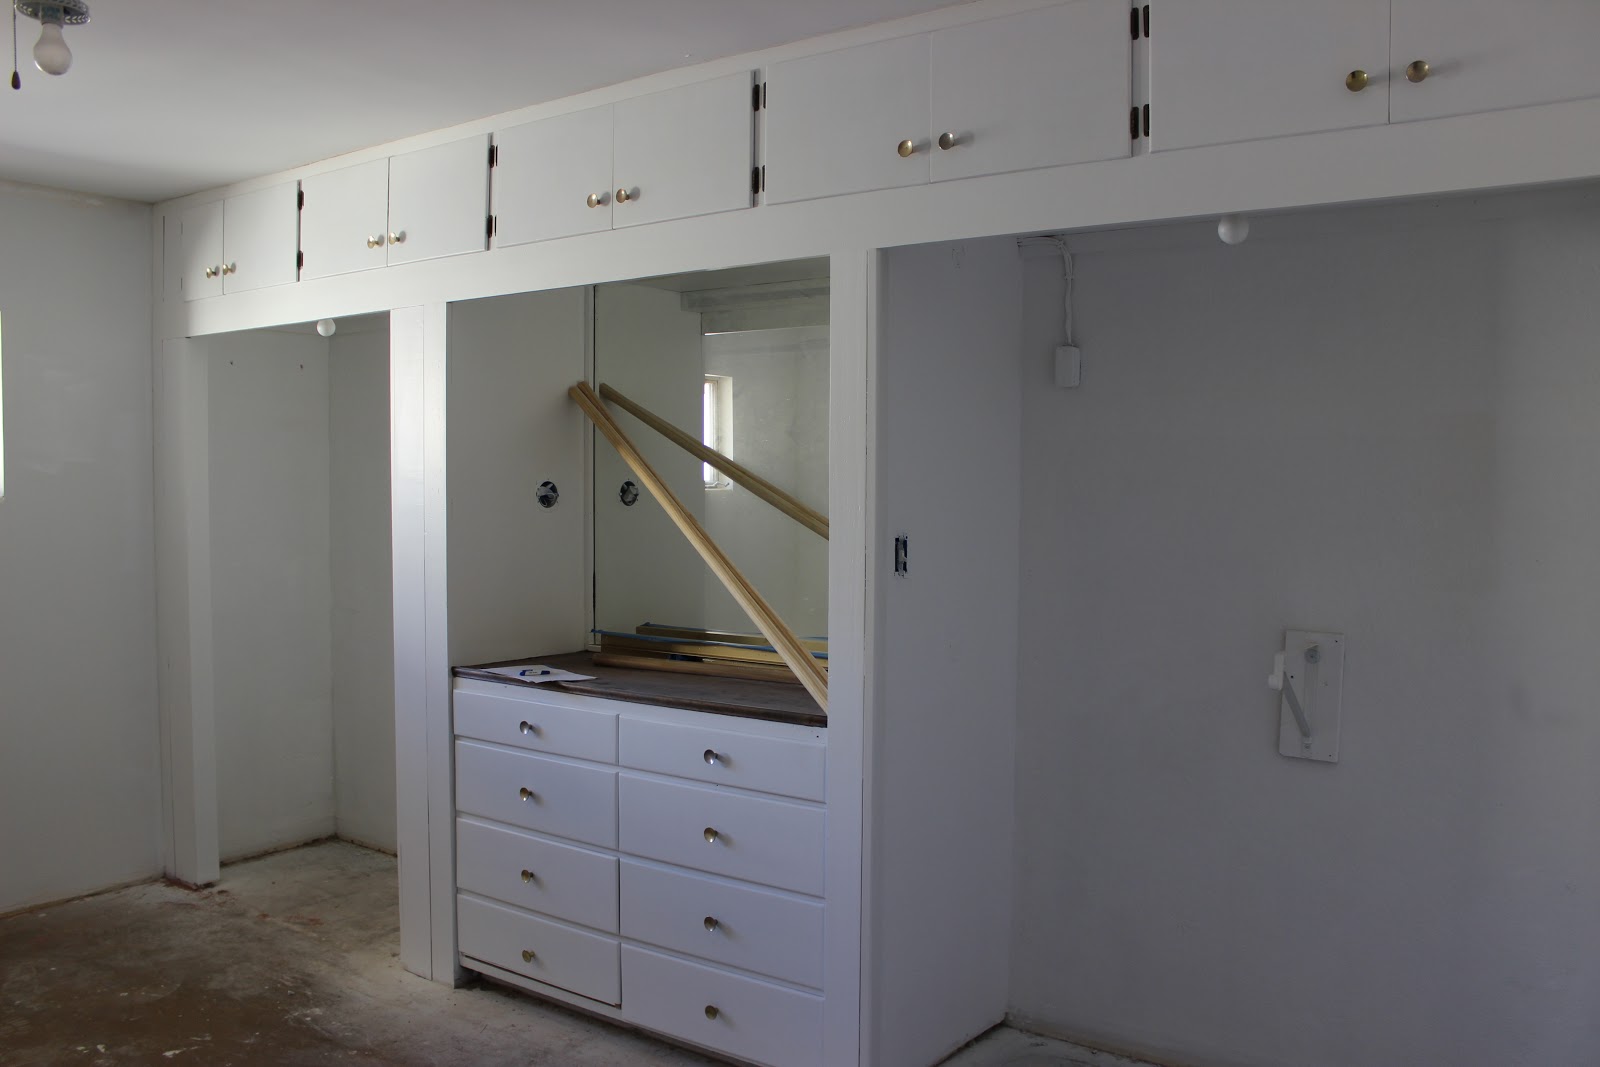
Here was our process:
- Sanded all the wood with a medium grit sand paper
- Used a paint sprayer and sprayed two coats of white {a paint-and-primer paint}
- Bled through completely
- Sanded some more
- Did another coat of paint, but this time used a roller instead of the sprayer
- Sanded some more;)
- Rolled on two coats of regular primer {not a paint and primer in one}
- Rolled on two more coats of paint-and-primer in one
- Finally the built-ins looked finished! Woohoo.
So here is what we learned so that if y’all are ever working on some tricky wood, you hopefully wont have to spend as much time {and paint} as we did.
- Sand way more than you would ever think needed. Esp. if you can tell there is a lot of lacquer don’t go easy on it
- We all love ourselves a great paint-and-primer in one, but now is NOT the time to use one. Stick to a basic primer for your first few coats, and then use the all-in-one
- Also, as much as we love our paint sprayer, rolling worked way better in this case because it applies much thicker than the sprayer

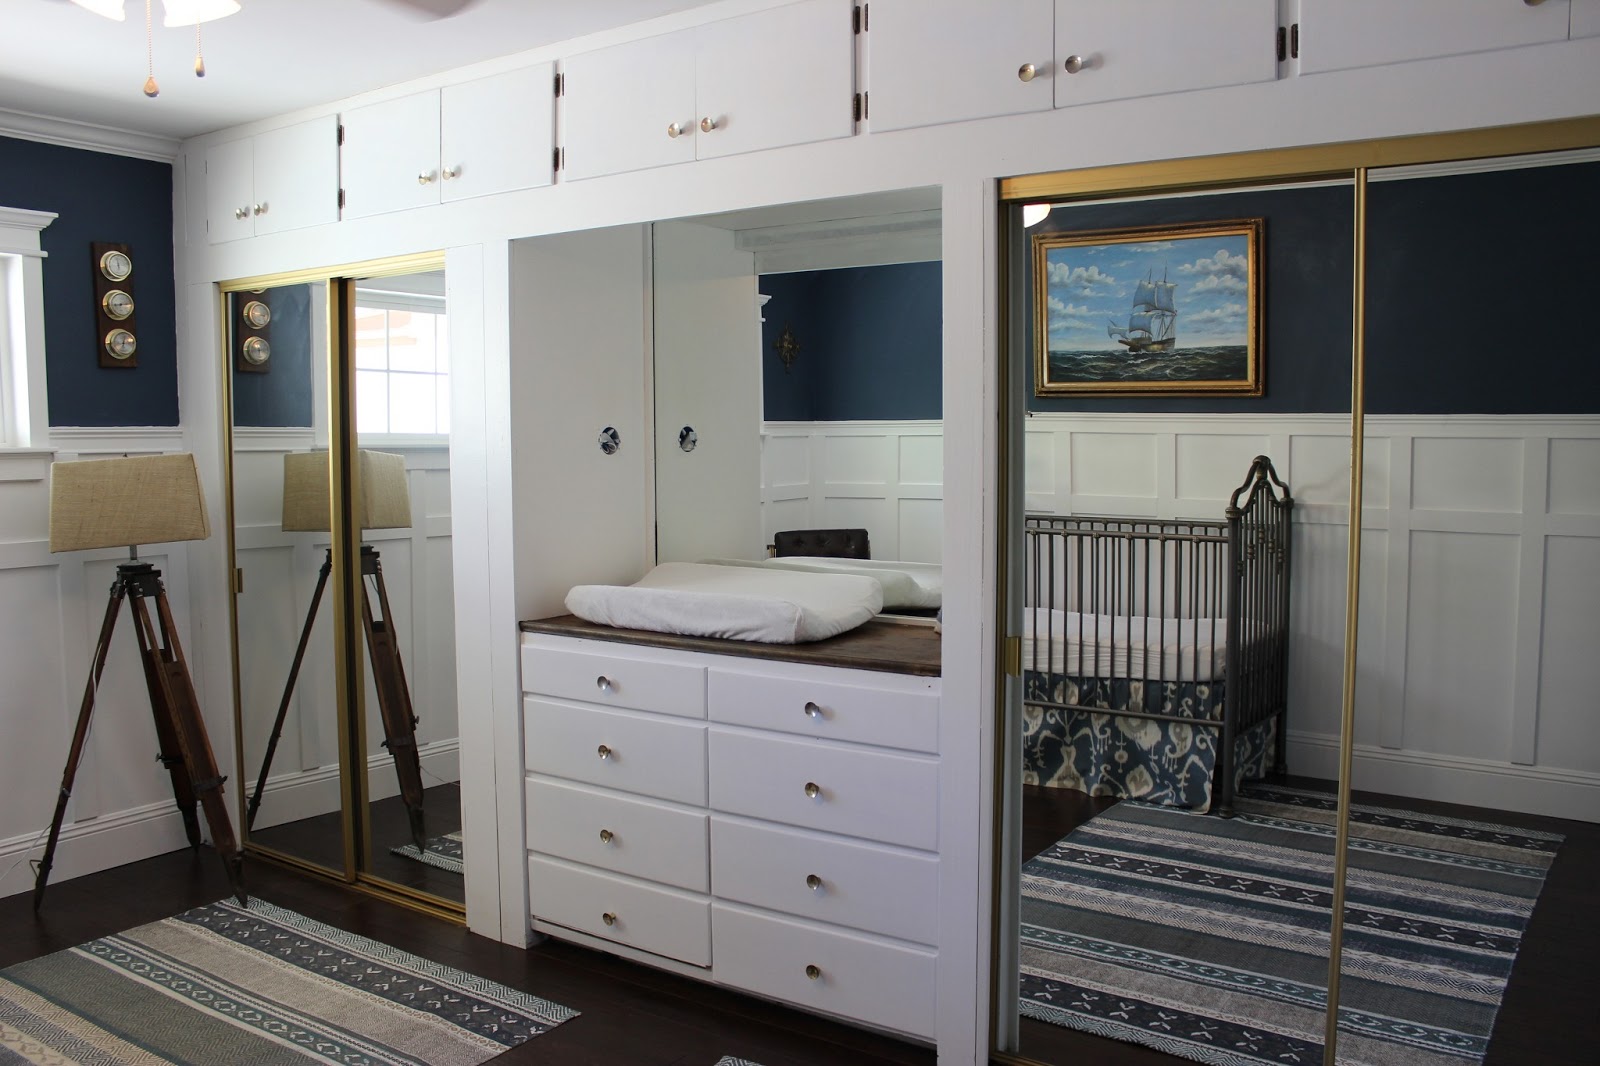

Although it took a long time and lots of hard work, it’s spectacular!
Going from that dark wood to white completely changed the room. I just love his room and it couldn’t have come with a more perfect changing table area!
I had a similar issue when painting my daughters nursery. We had all stained wood work in her room. But instead of sanding it all down to prime and paint it we used an adhesion primer from Sherwin Williams. It is pricey, but all you have to do is make sure the surface is clean then prime. I had to do two coats of primer then two coats of paint but turned out great. My sister was told to use it by a professional painter when painting her kitchen cabinets. Maybe this will save you some time in the future. The nursery looks great! Can’t wait to see more of the house.
wooden outdoor chairs… I am on my third can of paint stripper and it is a b! They look horrible right now but I persist because I know they can look awesome… as soon as the rain ends (next week??) I will continue
Sounds like the same issues we had with the door to my twins nursery. It is made out of plywood and it just kept bleeding. NOTHING we did prevented the bleeding. So we just painted it with chalkboard paint. It’s cute, but not really what we were going for. And unfortunately there are 2 more doors and a whole wall of built ins made from the same material. We can’t exactly paint them all with chalkboard paint!