
For the past couple of weeks we have been re-doing our bedroom, or should I say, finally doing our bedroom. We have never had night stands, lamps beside our bed, or a cohesive decor. We have been trying to do this project as DIY and cheap as possible..like always. One thing that we needed was some new bedside lamps. We both love the look of drum shades, but usually hate the price. Well, a few weeks back we found three drum shades on serious clearance at Marshalls. We used one for the tripod lamp, and the other two were for our bedroom. We knew we needed to change the fabric, and this time we wanted to go bold! So many things in our home are neutrals, soft, crisp, and for these shades we wanted to be daring. The nice thing about being daring with these is that if we ended up hating the shades in six months, I can easily re-cover them again!
Here is what we started with:


The shades were $5.50 and $6.50 and the fabric is from Joanns, with using my 50% off coupon, only $10 for 2 yards! We originally looked at SAS Fabrics for the fabric but couldn’t find anything. I love the fabric we chose, its super bold and fun. Random tip: Joanns has an iPhone app that is amazing! It lets you ‘clip’ any and all coupons that are currently running, and all you have to do is show the cashier your phone. No more forgotten coupons here!
Moving on, here is how I recovered these shades. I started by getting some tips from The Exchange Blog, and jumped in.
First- Lay out your drum shades seam in line with the end of your fabric:

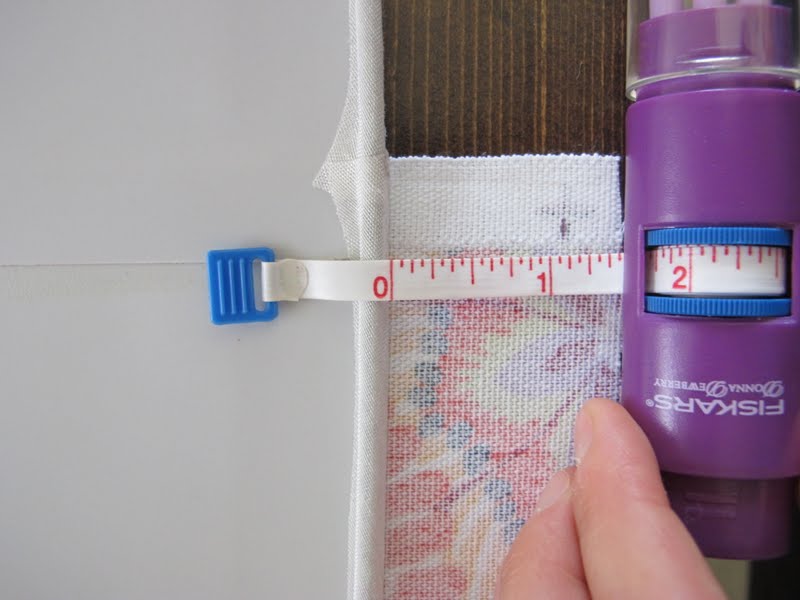
Third: Roll your drum across the fabric until you have completed a full circle and your back at the seam. Make sure you have your line {1 1/2 in. away} outlining the drum. This is what your fabric will look like once cut out:

Fourth:Once cut out, wrap around the drum to make sure it fits properly
 |
| ignore my excess fabric here, it was on purpose because I have a serious habit of cutting fabric too short |
Fifth: Start by glueing the fabric at the seam on one side:

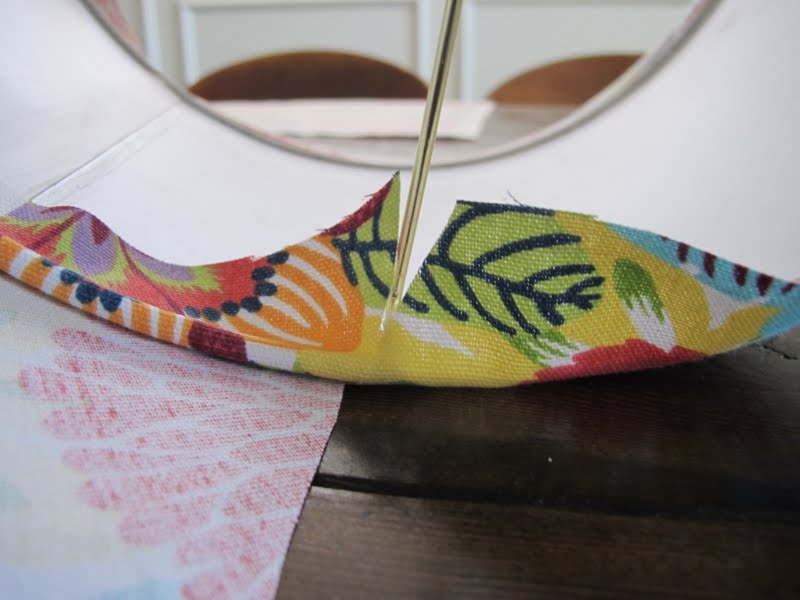
Eighth: Once all the fabric on the top and bottom is glued down, fold over 1in. of extra fabric to make a flap to cover the seam {sorry-no photo}. Then trim off all excess fabric on the inside of the drum:

Ninth: Step back and admire how you just covered a drum shade and made it new again!

Two Drum Shades: $12
Fabric glue: Already had {you could also use hot glue if you wanted}
Two yards of fabric: $10
Total: $22 for two new drum shades!
Have any of you covered drum shades already? Do you love how simple it is?! I will for sure be doing this more often!

Looks great! I’ve wanted to create a drum pendant over our dining table and I have an old shade that I wanted to recover but didn’t know how – thanks! It looks great!
That looks wonderful! I love the fabric. My husband and I just purchased a new home, and I’m all for cheap DIY fixes :).
Very pretty fabric and very neatly done!
Sometimes I think you read my mind…My bedroom lamp shades have got to go and this is a great idea.
Love that fabric!
Does adding the fabric dim the light at all?
Don’t use hot glue!!! I did that once and it warped my shade!!! Yours looks great 🙂
Yay! Love that you guys love the fabric too! Its super fun!
Marybeth- have fun! I have a feeling you will be doing a lot of projects really soon;)
Ashley- how perfect! Its super easy and doesnt take much time. Let me know how yours turn out!
Christen- It doesnt dim it any more than any other cover on a drum. The only thing we have noticed is that the light on the drum that was previously gold {the other one was white} is a little more dim, but thats because the original base rather than the fabric.
Anonymous- I figured it would be bad, but I had read so many places that it works well. Glad I just stuck with my fabric glue!
<3,
Adri
that lamp is adorable! great job. love the fabric choice
That has to be the most unique lamp base and shade ever! It is really wonderful. Nobody anywhere has one just like it, of that you can be sure. I think you could probably make a small fortune making teacup/pot lamps like that.
Can you tell us how you made the teacup base? I’d love to learn how to do that. Thanks.
June
Do you meant the bottom bowl?
Thank you. This looks easy even for me to do. I love the fabric. Do you know if I can buy the fabric in UK. I want cushions too. It is so bright and cheery.
hi shelia! I honestly dont know, im so sorry!! glad you like the project though.