I told y’all about our Tripod that we got last week, and now we finally have a finished product of it! Turning it into a lamp was about the easiest project we have done in months. To refresh your memory, here is what it looked like when we first got it:
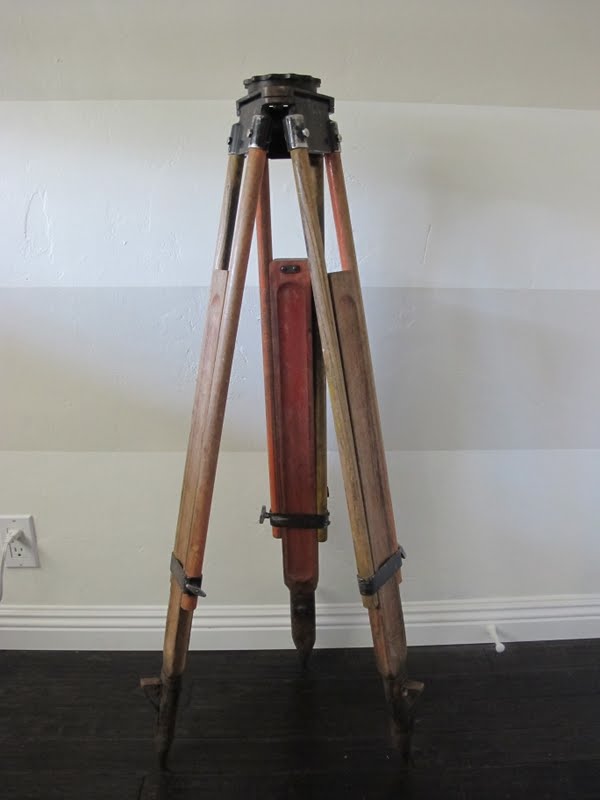

We loved it so much, but weren’t crazy about the color, so that was the first item up to change. We simply lightly sanded the wood, and used a Minwax stain: Dark Walnut. For the sanding, we didn’t go too agressive because we wanted a lot of the character to show through, so we even ended up leaving a little bit of the orange on there! Since the tripod had been painted previously, and wasn’t raw wood, the stain had to sit awhile for it to soak in fully. We ended up doing three coats in some areas, where it was necessary.
Now to make it into a lamp, instead of a simple tripod! This particular tripod made it about as easy as possible, with having a screw-on top.
The tools and pieces we used were:
1. A Lamp Kit from HD
2. 2 extended poles (this will be used to add height to the lamp, this is not necessary as the lamp kit comes with a small pole)
3. Extra washers and nuts (kit from HD)
4. 10″ Lamp Harp
5. Drill with 1/2″ drill bit. (We originally purchased a drill bit for metal but didn’t need it and used a normal drill bit).
 |
| Excuse the blue photo. I was at work when J took the photo, and instead of him changing the setting he repeatedly yelled at the camera “why are you taking blue photos!?!” I had to teach him that when in doubt-turn it to Auto! |
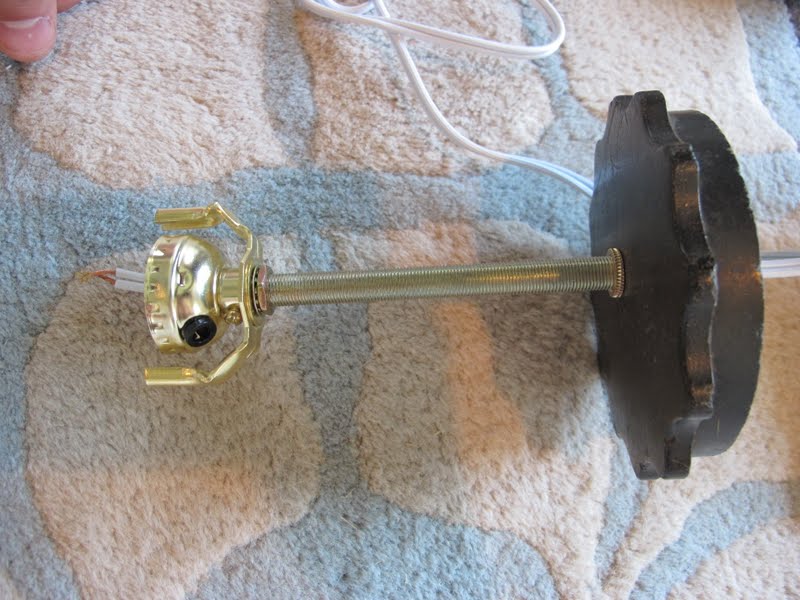
First- we simply screwed the top off, and drilled a hole with a 1/2 in drill bit that fit the lamp kit:

Next, you insert the pole that comes in that comes with the extended poles. These are hollow for the wires to be fed through.

Next, put on the washer, lock washer, and nut. Tighten these to the inside of the lamp top.


Loosen the screws on the mid section of the light fixture, this is what you will attach the wires to.

Separate the wires by pulling them apart. Tie them in a knot.

Next wrap one wire around each of the loosened screwed. To do this make the exposed end of the wire (remove some of the wire’s plastic coating if you need more wire) and wrap it in a backwards ? shape. Hook this to the skinny part of the screw, with the curve of the wire going clockwise. Then tighten the screws clockwise to secure the wires. With this kit it doesn’t matter what wire is connected to which screw.


Pull tight and add the light fixture top by insert it into the base and twisting.


Great vintage find and awesome lamp. You can’t find those just anywhere. I can’t believe you found the lampshade so cheap too.
Your hunt really payed off after the disappointment of losing that action tripod. You guys- amaze me. You are DIY masters. xoxo
Great job! You can’t make everything for $3. You will love this forever. The thing on the top is a “finial.” Start looking for them at garage sales because lamp making is in your future. Ann
That turned out beautiful! Love it 😀
This turned out great. I have been on the lookout for a tripod for this very same reason. Thanks for hte tutorial!
I like it but the lamp shade against your striped wall kind of gets lost. Maybe a light grey or a pop of color would make it really stand out. Still you guys did an amazing DIY project!
This turned out so well … and what a great lamp-making/wiring tutorial! 🙂
Wow this is fantastic!!! Great tutorial as well. You have me inspired.
Thanks so much everyone! Glad you enjoy it too!
Nutbird- thanks for the tip. I will be on the look out!
Treelo36- We agree. That will be the shade that we use, but we will probably recover it eventually.
Good luck on finding your own tripods ladies!
<3,
Adri
Hi, there! You’ve got so much creativity and I’m admiring them all. Can you share your creative posts at my Creative Bloggers’ Party & Hop? Hope to see you there 🙂
This is so awesome! I actually have one of these tripods languishing in my garage. Now I know what to do with it! Perfect! ~Rachel
I LOVE it!! I’m in love with tripod lamps, and yours is perfect! Great call on staining the wood a little darker-it was the perfect touch!
And your “how to” tutorial was very clear! Crossing my fingers I run across a tripod!
Rachel- Yay! So glad you already have one. Now get to work;)
Lindsey- Good luck. I hope you do too, because it really was an easy project!
<3,
Adri
Just came across this post when searching how to do this! My father-in-law gave us his old surveyor’s tripod (both hubby and FIL are surveyor’s). We have the top part (the scope) on our dresser as decoration but haven’t done anything with the tripod base- am now planning to make a lamp with it!!
I scored one of these tripods (a vintage one from the 30s) and was googling a tutorial and you popped up! Thanks for the steps 🙂
Your knot tied in the wiring is not correct. Please refer to lamp making section to find out the correct and safest way to tie this knot. There is a particular name for it. Always be safe. Thank you.
The knot is called an Underwriters Knot. Thank you.
Really clever idea! I’d never heard of this type of lamp, but it would really look nice in the right setup!
Quick question – Do you have a problem with the pointy tips on the legs scratching the floor?
The lamp is great. Just a suggestion, maybe use a clear or brown cord and “hide it along one of the legs after it is done and you decide where to plug it in. That way you will have enough slack.
Great directions. I have 2 OLD surveyor tripods of my grandfathers.
That tripod was the score of the century! Looks awesome!
Thanks girlfriend!